Wednesday, November 20, 2013

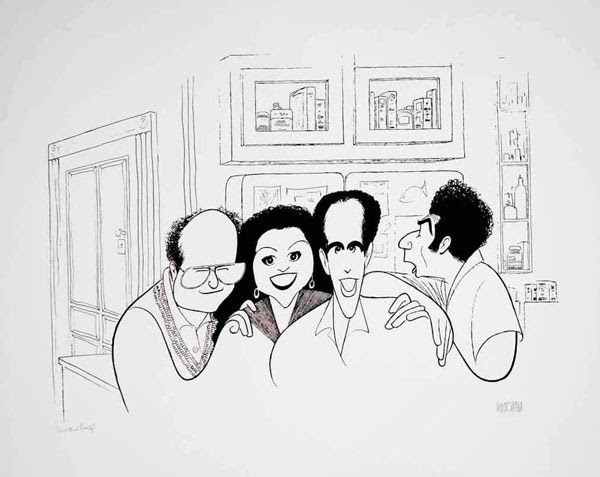
Al Hirschfeld - Inspirational Artist

"You always feel the drawing you are working on is the best you've ever done... I am only interested in the present."

-Al Hirschfeld

Al Hirschfeld - Self Portrait


Al was a great cartoonist most well-known for his caricatures in New York Times, as well as many works of film/theater artists.  He used a line to portray a person as well as their personality.  He let the line speak like no one else.

His Work:


Nina:

Hirshfeld was also known for hiding treasures in his work.  Every piece has his daughter's name, "NINA" hidden within the lines.


I hope you find some inspiration from Al Hirschfeld. I absolutely love his work, and how unique it is.  I came across an entire wall in Philadelphia of his work... It is amazing! 

Prince Music Theater (Philadelphia, PA)

-Moni


Thursday, November 14, 2013

Inspirational Artist - Monet

Paintings envelop you in a feeling portrayed by the artist.  My favorite paintings that evoke a lovely feeling are by Claude Monet.  If you're not familiar by his work already, enjoy the colors and scenes of the impressionist era.


Claude Monet


Claude Monet was born in Paris Nov. 14th 1840.  At age 11, Monet entered Le Havre secondary school of the arts.  He studied under Jacques-Francois Ochard,  and was later mentored by Eugene Boudin.

Painting by: Jacques-Francois Ochard

Painting by: Eugene Boudin


Impressionist Paintings:

Impressionism was actually named after one of Monet's paintings: "Impression, Soleil Levant" (Impression, Sunrise).

Impression, Soleil Levant (Monet)


Characteristics of Impressionist paintings:

  • Small,Thin, yet visible brush strokes
  • Open composition
  • Emphasis on accurate depiction of light in its changing qualities
  • Ordinary subject matter
  • Movement depicted as a crucial element of human perception
  • Unusual visual angles

Monet's Work:

Boat Studio (Monet)


Monet used a 'boat studio' to create his pieces from the center of the pond.  His better known paintings depict waterlilies, ponds, and bridges over water, although his work spanned countries with many different landscapes and sometimes portraits as well.

Moni's Monet:

I created this for a class as an art appreciation piece.  I layered and melded together elements of myself admiring his work, with one of my favorite Monet paintings.


-Moni


Wednesday, November 13, 2013

My Etched Wine Glass

I used glass-etching for a graphic design class.  I wanted to make a unique marketing item.  Check out what I created and how the glass-etching process works.


The Logo:

I created this Logo in Photoshop, for a project.
("Life by the Sea" is a fake non-profit that cleans beaches and protects marine life)


Needed:

  • Wine Glass - (4 for $5 Walmart) *You can use anything that's glass*
  • X-acto Knife
  • Contact Paper - (Large roll for $6 Walmart)
  • Armour Etching Cream - (Small bottle for $13 Michaels)

The Template:


I used contact paper and an X-acto knife to cut out the logo.  To do this, I printed the logo in the appropriate size, and carefully cut through the printed page, and contact paper on top of a cutting pad.

Text was very difficult to create a template for, because the space in the center of some letters would have to be manually placed onto the glass (example: "e" and "a"), not to mention it is very thin at times.

I also used a hole puncher to create bubbles going up the side of the glass.


Placement: 


Contact paper is like a gigantic sticker.  I carefully detached the backing, and placed it onto a clean wine glass.  It was imperative that each border was stuck tight to the glass to prevent the cream from etching beyond the template.


Etching:


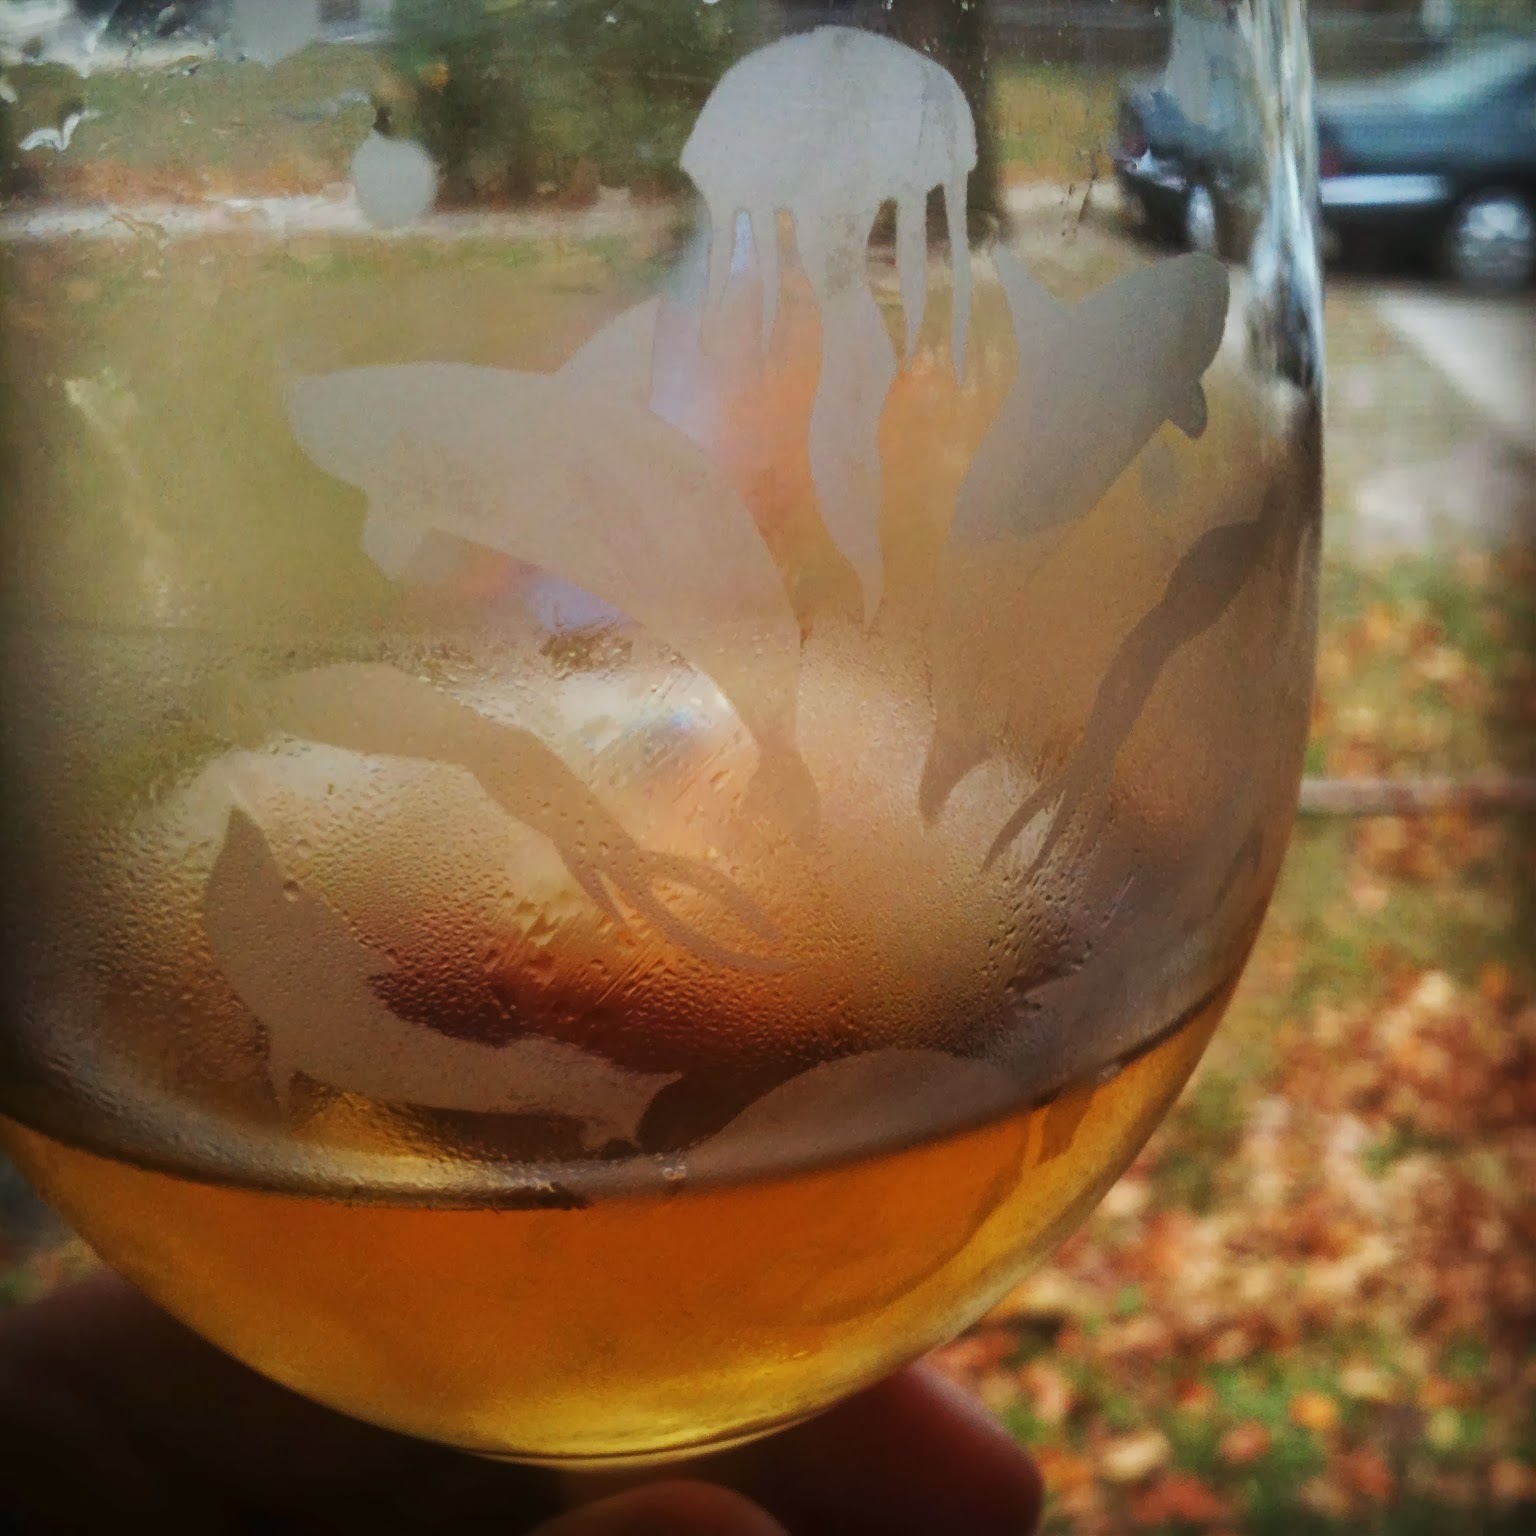
Armour Etching Cream was very simple to use.  I simply painted it on with a standard paint brush, let it sit for 60 seconds, and rinsed it lightly with warm water in the sink. This is not a frost paint layer, this solution is actually interacting with the glass. (Once the glass is dried, you will see the etching much clearer)  It begins to work instantly, so there is no way to fix a mistake. 


*Notice: Etching cream is highly dangerous and children should never be near it.  Take precautions.  Use gloves, protective eyewear, and an apron or old clothes.  The cream is highly corrosive and can burn your skin.


My Results:


Hints:

  • Because my design was very intricate and had delicate edges, the cream did expand the perimeters in some instances.  I suggest using a slightly simpler design, and a flatter glass.  (Wine glasses curve from top to bottom making it difficult to place the stencil correctly).

  • I also tried frosting majority of the glass and having only parts clear, but it didn't come out the way I was hoping.  I think it would be fine with several rounds of etching, but placing an identical stencil in the exact spot again would be difficult.  It left brush strokes. 

  • Definitely use the cream generously.  You want a thick layer to cover it well.


I hope you are inspired to give this a try.  It really looks professional, and will last forever.

Enjoy! 

-Moni


Tuesday, November 12, 2013

Glass Etching

This is an artistic medium that is very unique.  I was introduced to glass etching while looking for marketing techniques for a graphic design project.  What's amazing to me, is how quick the whole process is.  With the right design, anyone can do this.

What is glass etching?


Glass etching is the technique of creating art on the surface of glass by applying acidic, caustic, or abrasive substances.  It gives the glass a frosty look.


In History


This technique began before the 1860's, and in the 1920's glass etching became more easily accessible when manufacturers used moulds to etch glass which reduced the cost.


The Process


If you would like to learn how to do this.. check out this tutorial:

etched glass tutorial


Check next time to see my version of this Artspiration.  If you decide to give it a go, please share your results.

-Moni

Tuesday, October 22, 2013

Paper Nuptials


As inspired by the beautifully detailed work of Brittney Lee, I have created this card for a day to remember forever - Kelly and Greg's Wedding.

Congratulations Kelly & Greg!


Kelly, my cousin and best friend, married her Prince, Greg, on October 17, 2013.  It was a very sweet ceremony outside by the Rancocas Creek around sunset.  The couple gathered close family members for the very special marriage.  Kelly wore a light pink dress, and Greg wore his navy uniform as a friend of the family married them. Everyone was so happy and excited for them to begin their wonderful lives together.


For such a special moment in their lives, I wanted to create a card that would capture the moment.  Despite the size of this wedding, there were a lot of nice details that have a lot of meaning.  I wanted to try to incorporate as much as possible.

Here's How I Created This Piece:


Tools Needed


Sketch, Cut-Out, & Color
Glue together layers

The vail Kelly wore was made by hand.  We held a family and friends craft night, and created the flower and vail piece by piece.  The beads in the center of the flower were beads from our great grandmother.  I glued one on the paper version to add a nice touch and depth to the piece.  The paper vail was actually a fine tool fabric cut to fit.

Fine Details
Fine Details
Actual Flower


I tried to mimic some of the techniques Brittney Lee uses in her pieces like having different depths rather than just flat pieces of paper.  I also added the tree to fill some of the outside of the piece so your eye has more movement and it centers around the couple nicely.  And in the hole in the tree I wrote the date (10-17-13).


In all, I loved creating this paper art.  It was time consuming, and very delicate but I found that using the exacto knife and a mix between color pencils, markers, and paint pens, I could really create what I was picturing.  I had a lot of control over the elements, but I did have to re-create or practice a lot of them multiple times.  It's definitely an art form that needs patience.


I hope you enjoyed my version of paper art.. if you give it a try please share your work.

Come back next weekend for some more Artspiration!

-Moni


Saturday, October 19, 2013

Paper Art

Who said paper has to be so flat?  There are tons of options for creating with paper beyond what you may have ever thought.  Have a look at what one artist has done to push the boundaries.

Brittney Lee is an artist from California whose medium consists of paper, paper, and more paper (well, maybe a little glitter and paint too).  Her whimsical style, and creative touches make her pieces stand out of the crowd. touch your heart, and leave you feeling good.


I came across Brittney Lee's blog a few years back, and have found so much inspiration from her whimsical characters.  They all scream love and happiness in a cute way.  I found her work to be so inspirational because of the fullness of each of her pieces.  Every detail, and every inch of the canvas is perfectly planned and beautifully executed.


Brittney Lee's multi-dimensional paper art has an amazing amount of detail.  She layers paper upon paper to give you something to look at that you could stare at for days.  She is an illustrator, and you can clearly see her style is fine-tuned. What I find to be most inspiring, is the actual layout of the piece, and the pose in which each character assumes.  Her pieces are all so lively, and interesting to look at.


Brittney Lee has achieved and been a part of many things.  Check out the book she illustrated, entitled Tangled: A Dazzling Day, based on Disney's Tangled.


If you want to purchase a print of one of Brittney Lee's artwork, check out her Etsy page: britsketch


Join me later for my version of this artspiration!

-Moni

Sunday, October 13, 2013

A Super Stop Motion

My Stop Motion:

Here's my version of stop motion animation.  I used the free app to take the consecutive pictures, and imovie to add the sound effects. This was so much fun.  Enjoy!


My Inspiration: 


The App:


I used "Stop Motion Studio" to take the photos for this stop motion video.  My favorite part of this app is that it has an opacity control.  This allows you to see the last picture you took, and adjust it so you can see what you are about to shoot at the same time.  Because stop motion is basically creating each frame one photo at a time, this option helps to easily create a more seamless animation. This app made stop motion very easy to create because it puts the photos together into a video for you.  So, give it a try! ( This was one very memorable night lol).

To create this Superman stop motion animation, I put 167 photos together, 2 songs, and 3 different sound effects.  It took 30 minutes to decide on a story, 80 minutes to arrange props and take each photograph, and 110 minutes to add special effects, audio, and fine-tune adjustments for finalization.  I used 5 pillows, 3 watches, 3 clocks, and 1 very amazing boyfriend to create this film.  I hope you enjoyed it =) because I loved creating it.

Check It Out:

Here's my very first stop motion animation: Adventures of Rudy .  I created this in Fall 2012-13 for a video class.  


Stop motion allows you so much control with every shot and every movement... the options are endless.  If you want to share something you've created, or a stop motion animation you have found to be inspiring please share it with me.


Join me next weekend for some more Artspiration!

- Moni